Junie IDE plugin
The recommended way to use Junie is from the single AI Chat in your JetBrains IDE: select Junie by JetBrains from the list of supported coding agents and have it downloaded automatically.
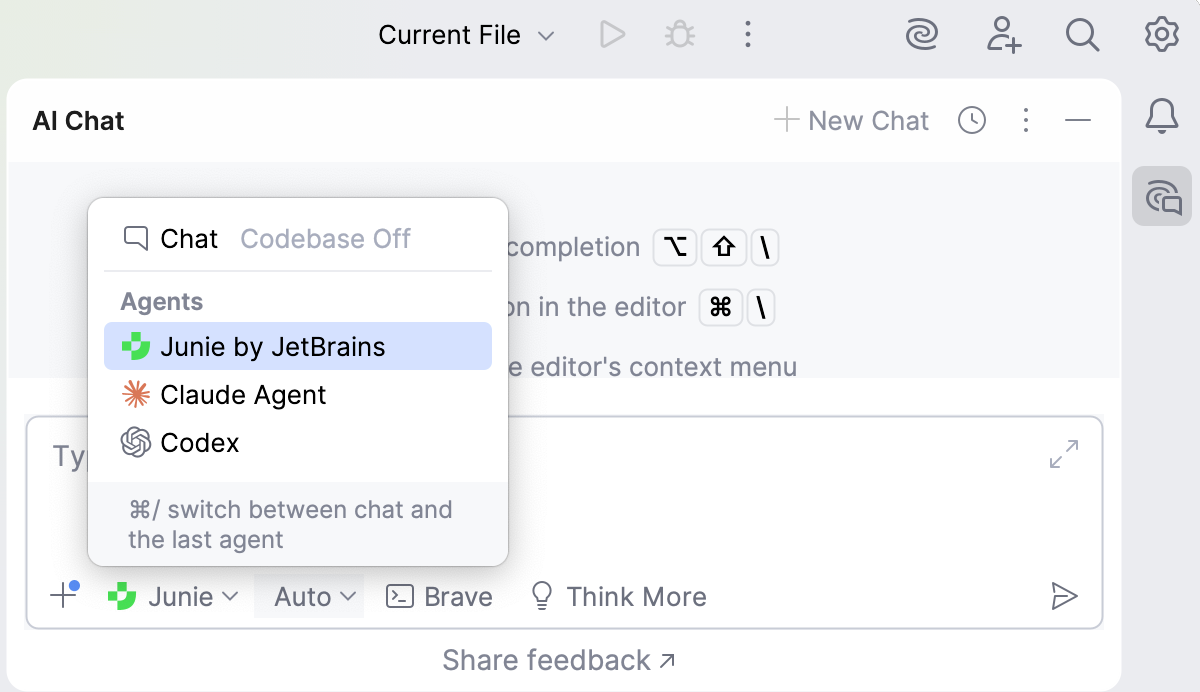
Installing the Junie plugin manually is required only if you want to use Junie from a separate tool window. This page describes how to install and work with the Junie plugin outside of the AI Chat of your JetBrains IDE.
Install the Junie plugin
Junie is also available in Android Studio – the official IDE for Android app development, created by Google and based on IntelliJ IDEA by JetBrains.
Install Junie from Marketplace
In your JetBrains IDE, press Ctrl+Alt+S to open settings and then select Plugins.
Click the Marketplace tab and type the plugin name in the search field.
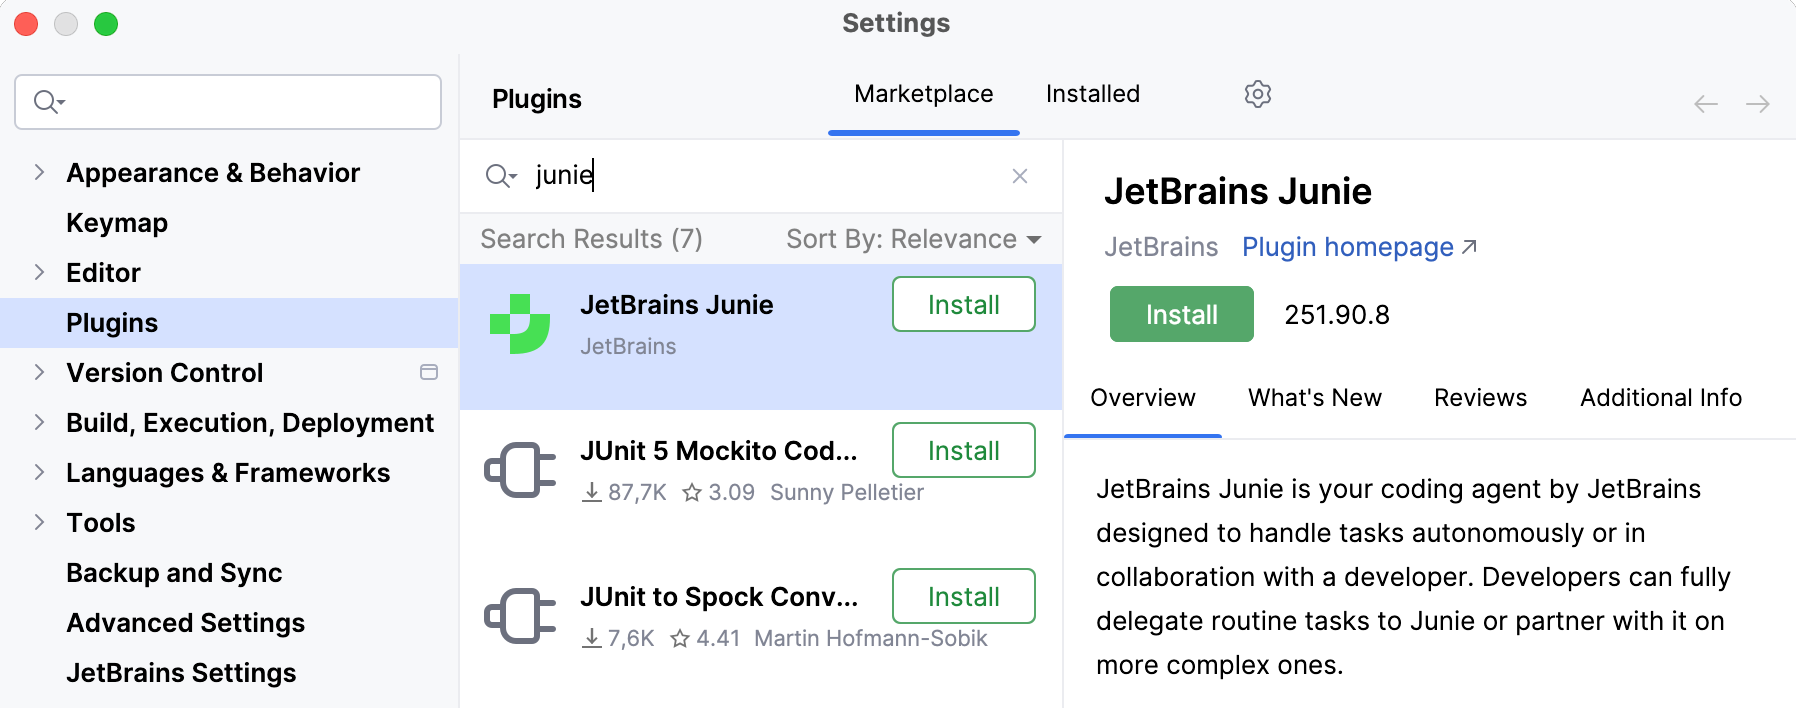
Click Install.
Install Junie from disk
Download the plugin from the JetBrains Junie plugin page in JetBrains Marketplace.
In your JetBrains IDE, press Ctrl+Alt+S to open settings and then select Plugins.
On the Plugins page, click
 and then click Install Plugin from Disk.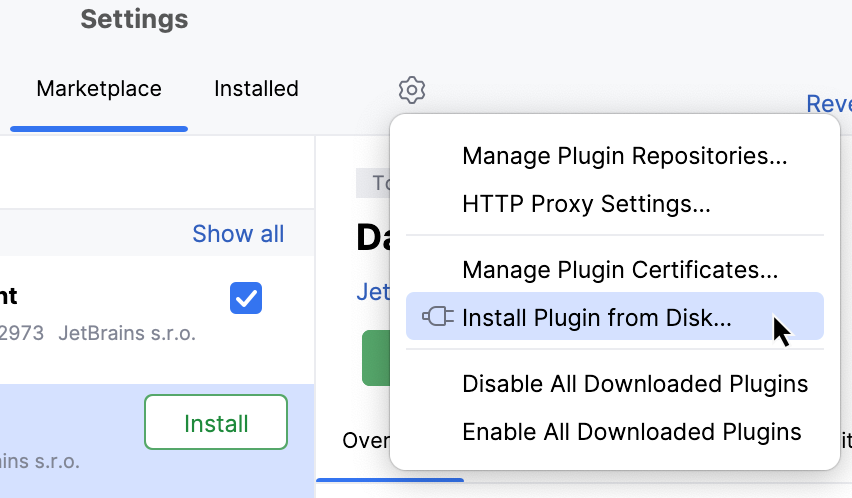
In the dialog that opens, set the path to the downloaded plugin
.zipfile and click OK.
The installed plugin adds a  Junie icon to the IDE sidebar on the right. You can also open the Junie tool window by selecting in the main menu.
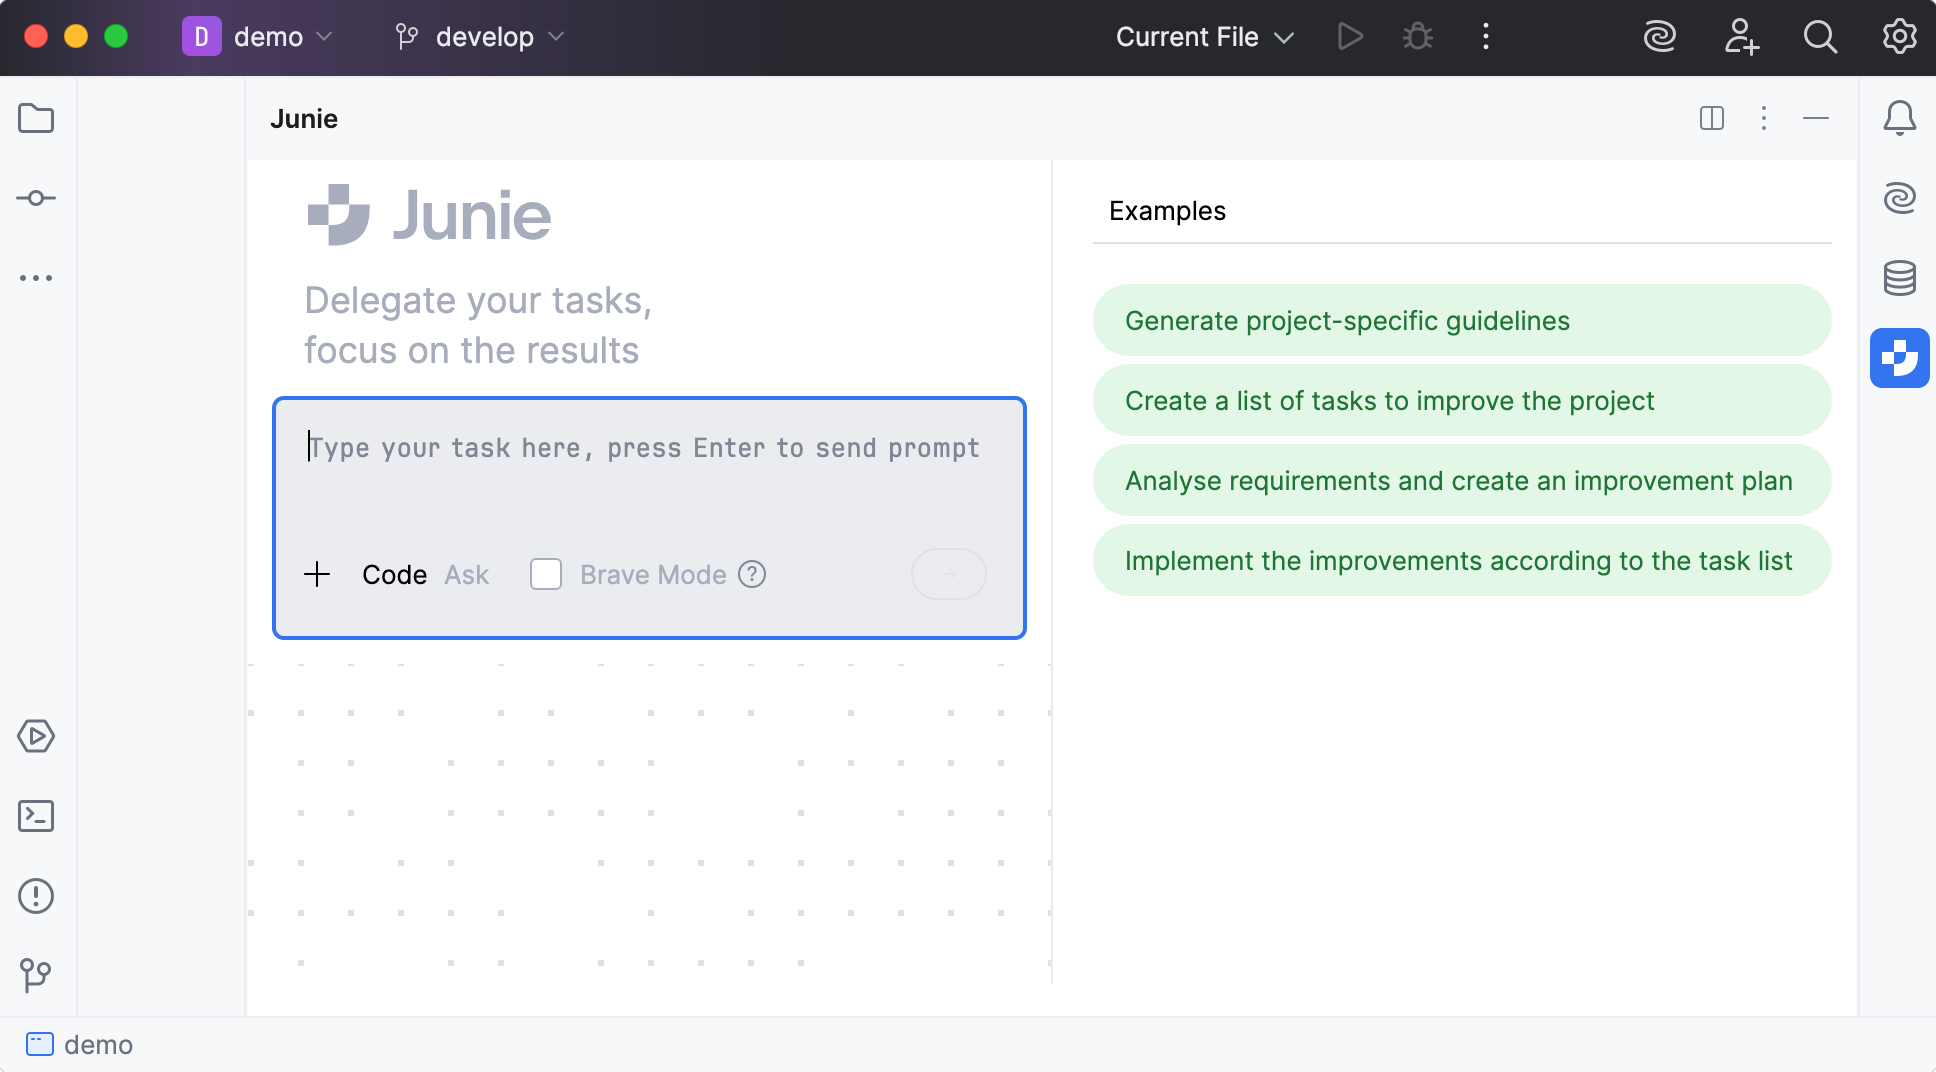
Agent modes
Modes in Junie are agent configurations that enable tailoring Junie's behavior to different types of tasks.
Code mode
In code mode, Junie breaks the task into a multistep plan and executes the proposed plan while reporting back to the user on the progress. To execute the task, it can autonomously run terminal commands, create new files, write or edit code, run tests, and verify the changes.
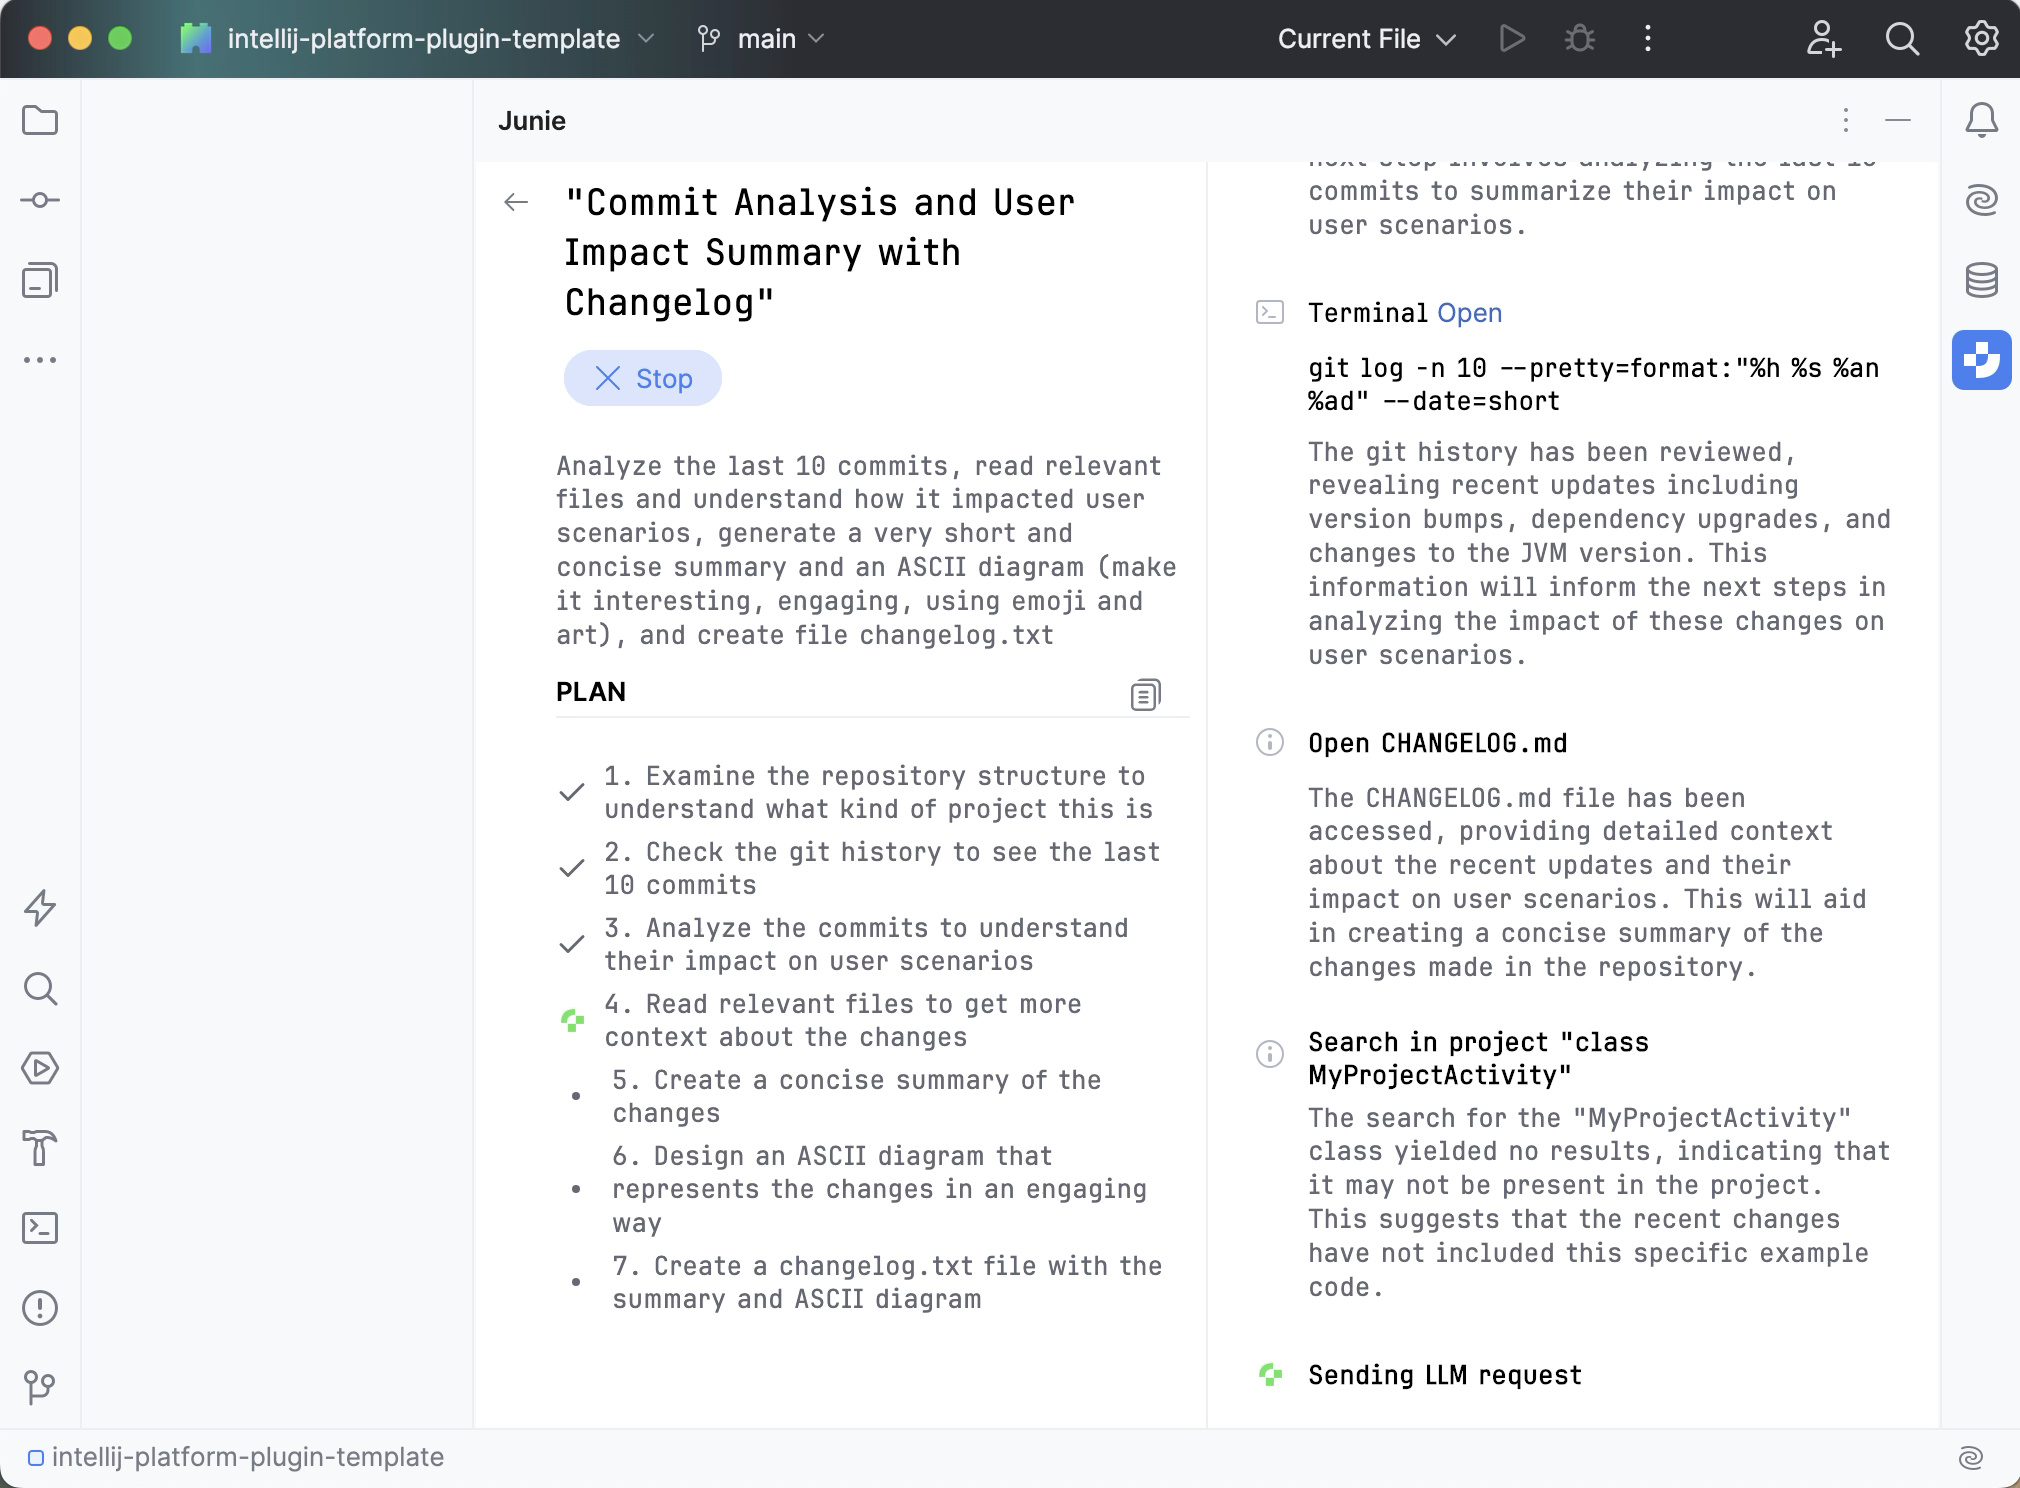
When the task is done, you can give Junie follow-up instructions, keep the changes and start a new task, or decline the changes and roll everything back.
Ask mode
In ask mode, Junie operates in read-only capacity: it can explore files, analyze code, and understand project structure, but cannot modify the code or the project files.
Use ask mode to get answers to your questions, explore and understand the codebase and the project structure, collaborate with Junie on the action plan, or brainstorm new features and improvements.
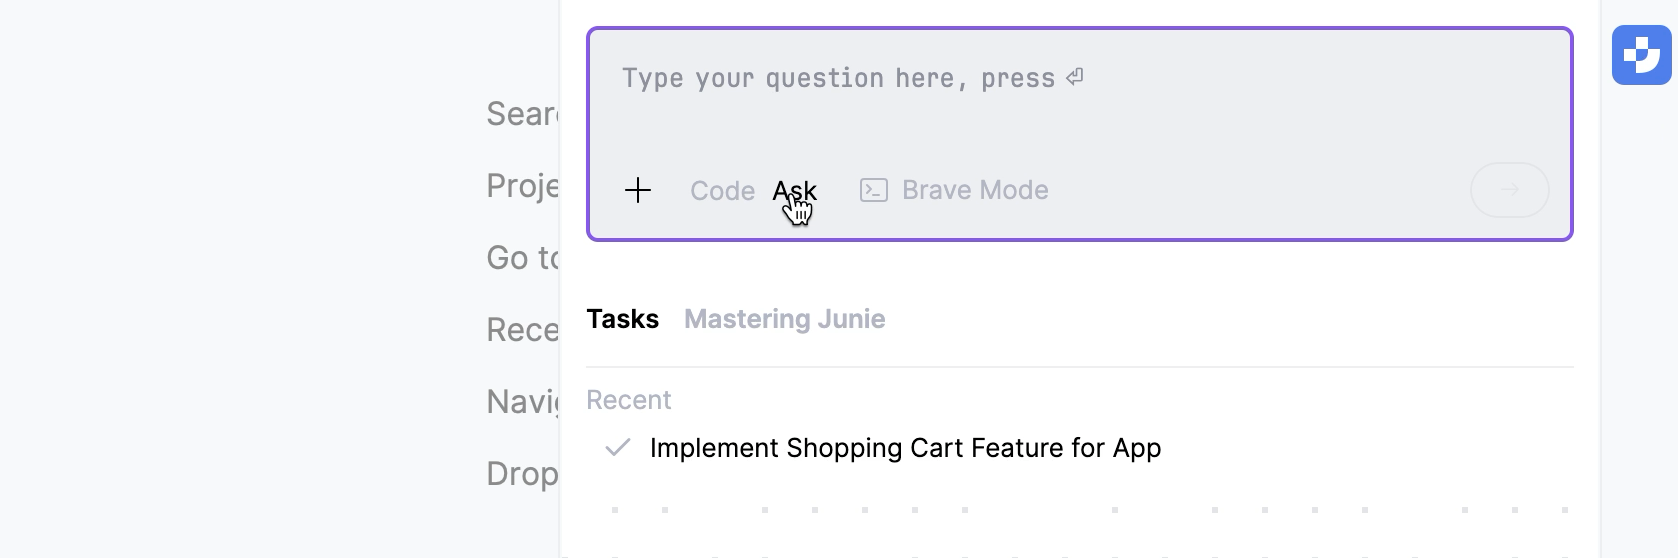
Switching between modes
To switch between modes, use the mode picker dropdown in the prompt window. Select Auto to have Junie figure out which mode to use on its own.
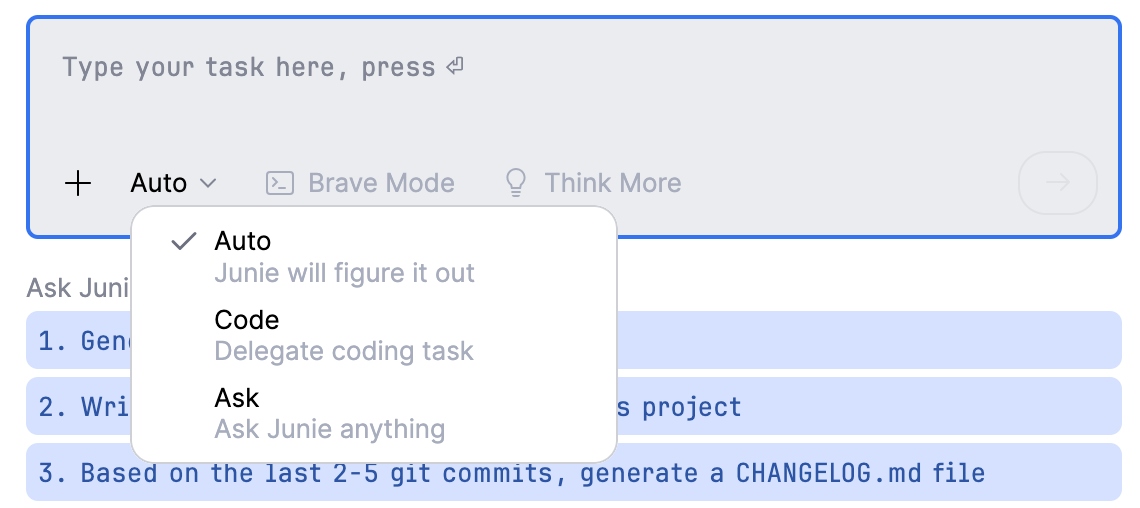
Brave mode
You can authorize Junie to execute all potentially sensitive actions without user approval by selecting Brave Mode in Junie's task window. However, using brave mode is not recommended. Opt for adding actions to the Action Allowlist whenever possible.

Action Allowlist
Most terminal commands, code execution, and execution of MCP tools are considered to be sensitive actions, and Junie by default requires explicit approval from the user for executing them. With Action Allowlist, you can specify the actions and commands that Junie is allowed to always execute without user approval.
Add rules to Action Allowlist
From Junie's tool window
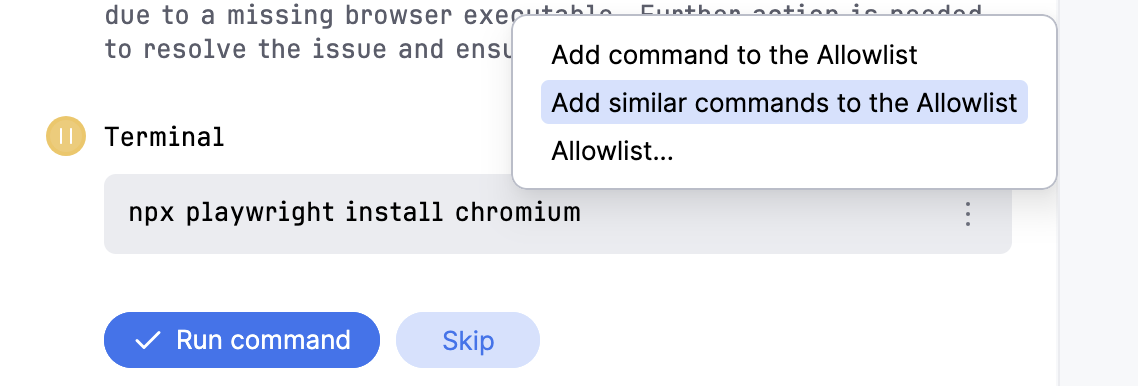
You can add rules to the Action Allowlist right from Junie's tool window while the agent is executing the task. To do so, click  next to the executed action and select either of the following:
Allow this command to add only this particular command to the Action Allowlist.
Allow similar commands to have Junie generate a regular expression (Regex) for this command pattern and add it to the Action Allowlist.
For example, for the
git log --oneline -2command, a^\Qgit log --oneline \E\S+$RegEx will be added.Allow all action type commands to add all actions of this type to the Action Allowlist.
Allowlist to open the Action Allowlist settings page.
In the settings
To view and edit the full list of currently allowed actions or add specific rules, go to Settings | Tools | Junie | Action Allowlist.
Restrict access to files or folders
You can restrict Junie from processing the contents of specific files or folders by creating and configuring an .aiignore file in the project root directory. If a file or folder is on the .aiignore list, Junie will ask for explicit approval before viewing or editing it.
The .aiignore file follows the same syntax and pattern format as the .gitignore file.
Add .aiignore file
To add the .aiignore file, click  on the prompt panel and select Create AI ignore file.
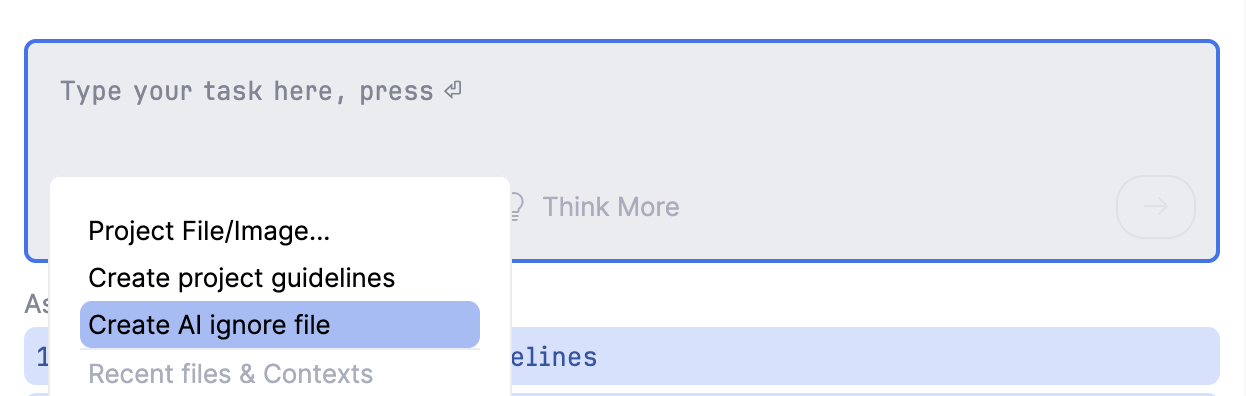
A configured aiignore file might look as follows:
Diffs and review
Diff viewer
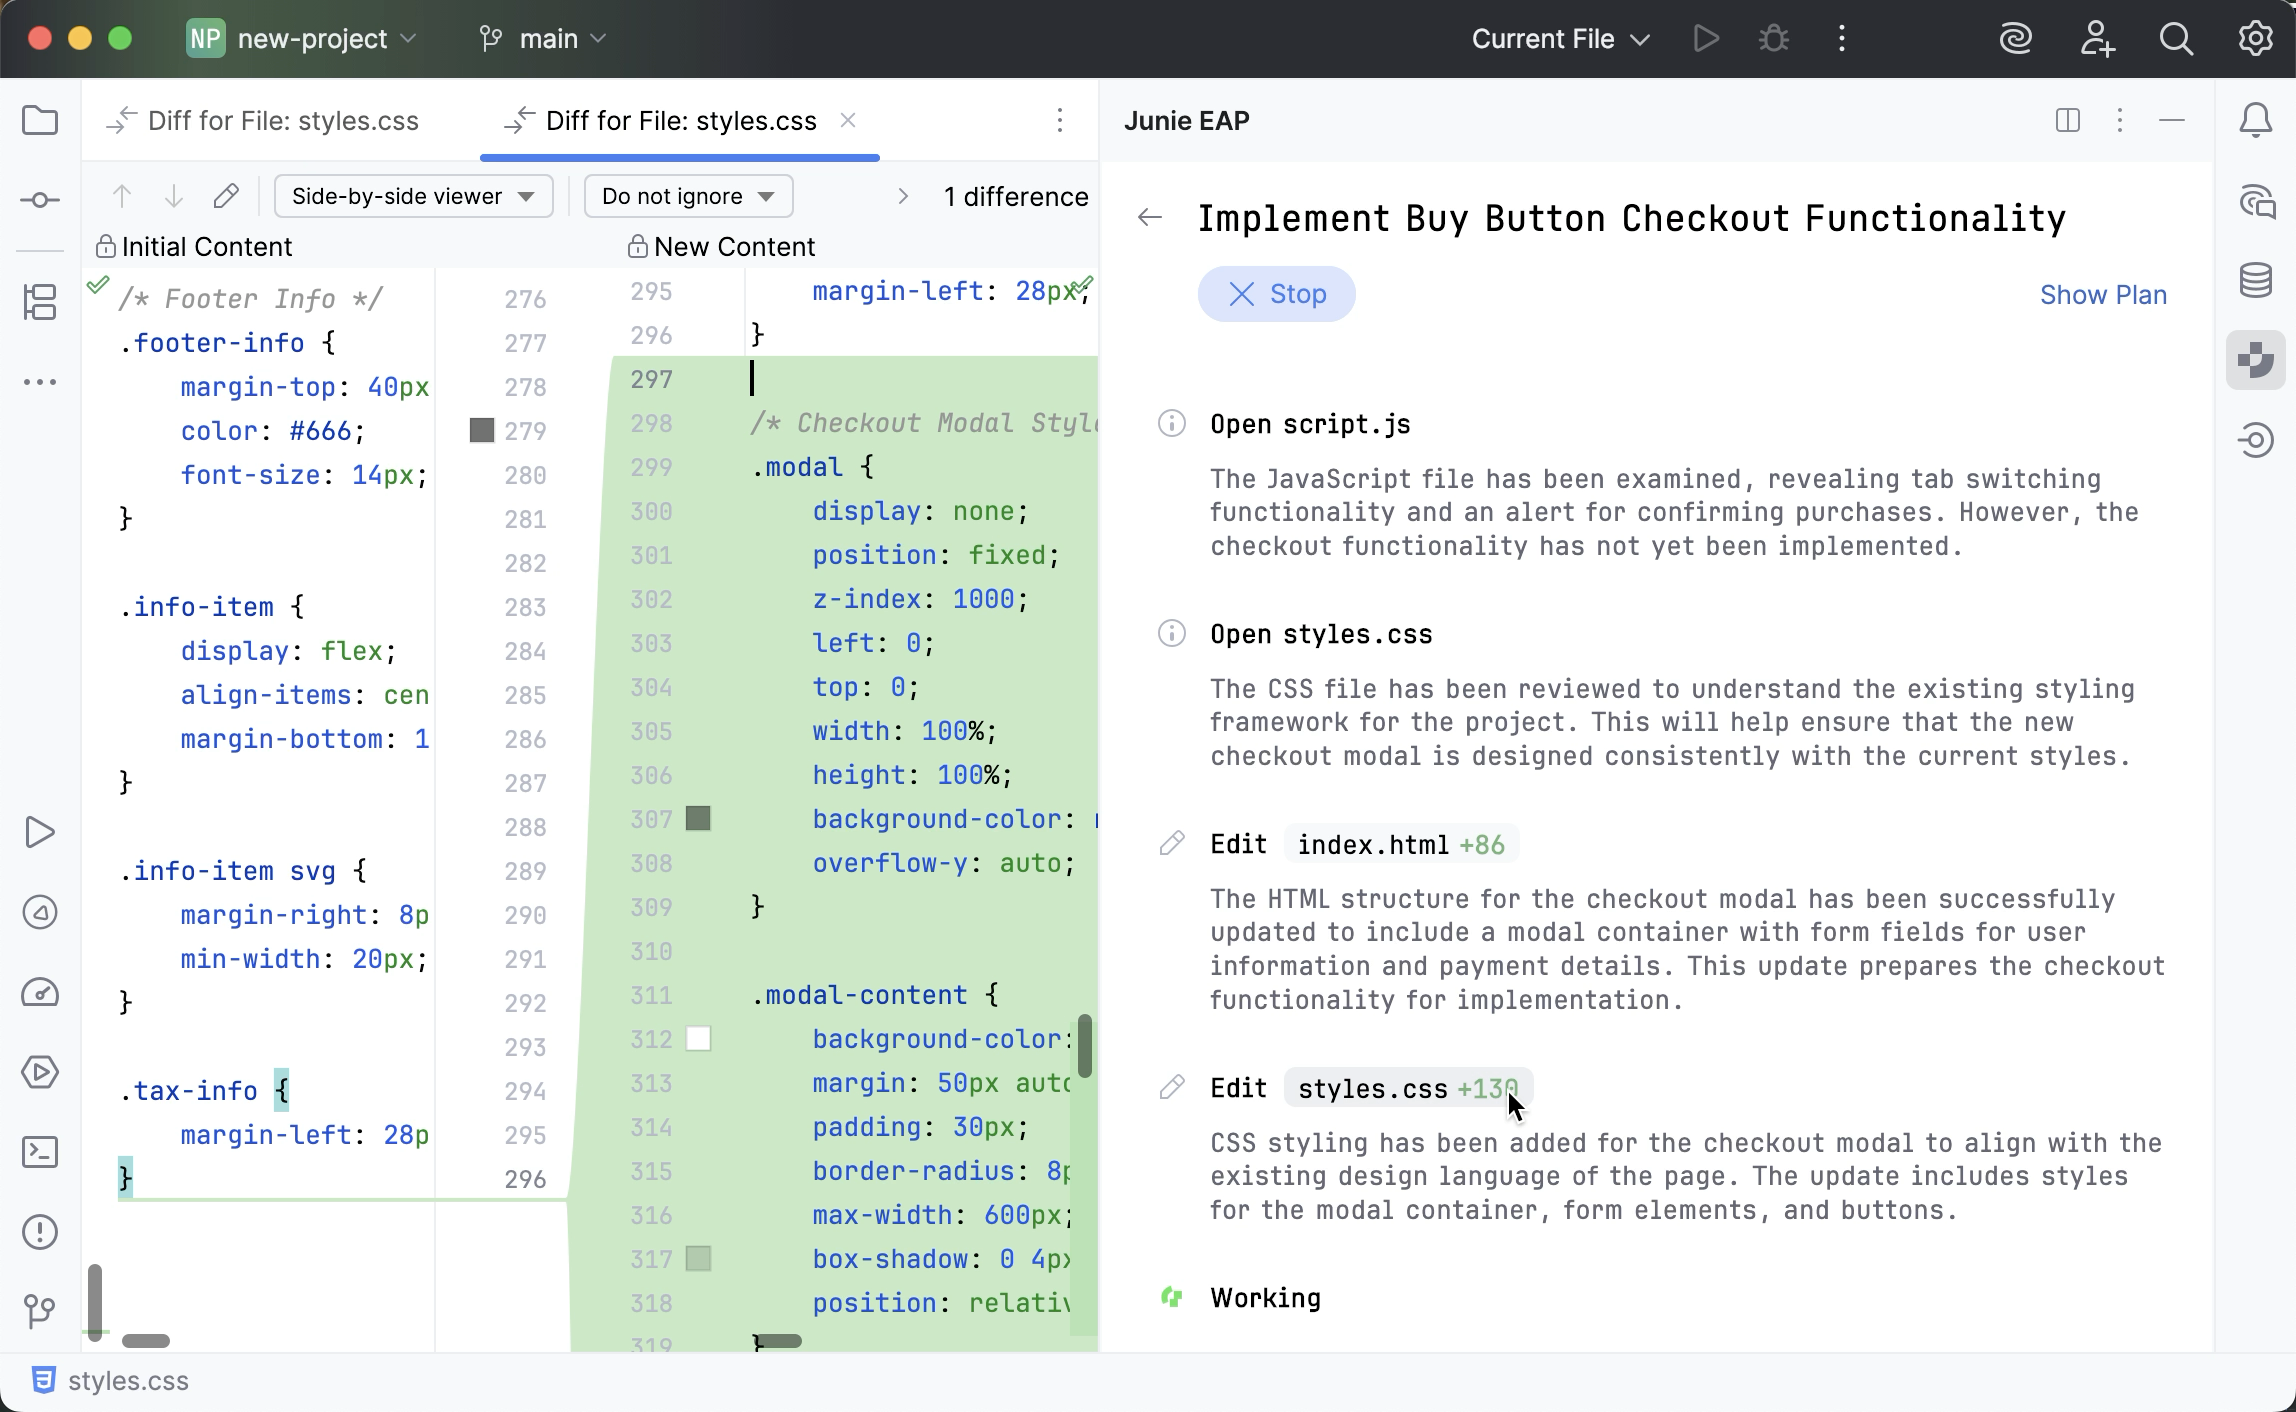
As Junie reports which project files it adds or edits, it also provides links to view the code changes in the diff viewer.
Apply/reject
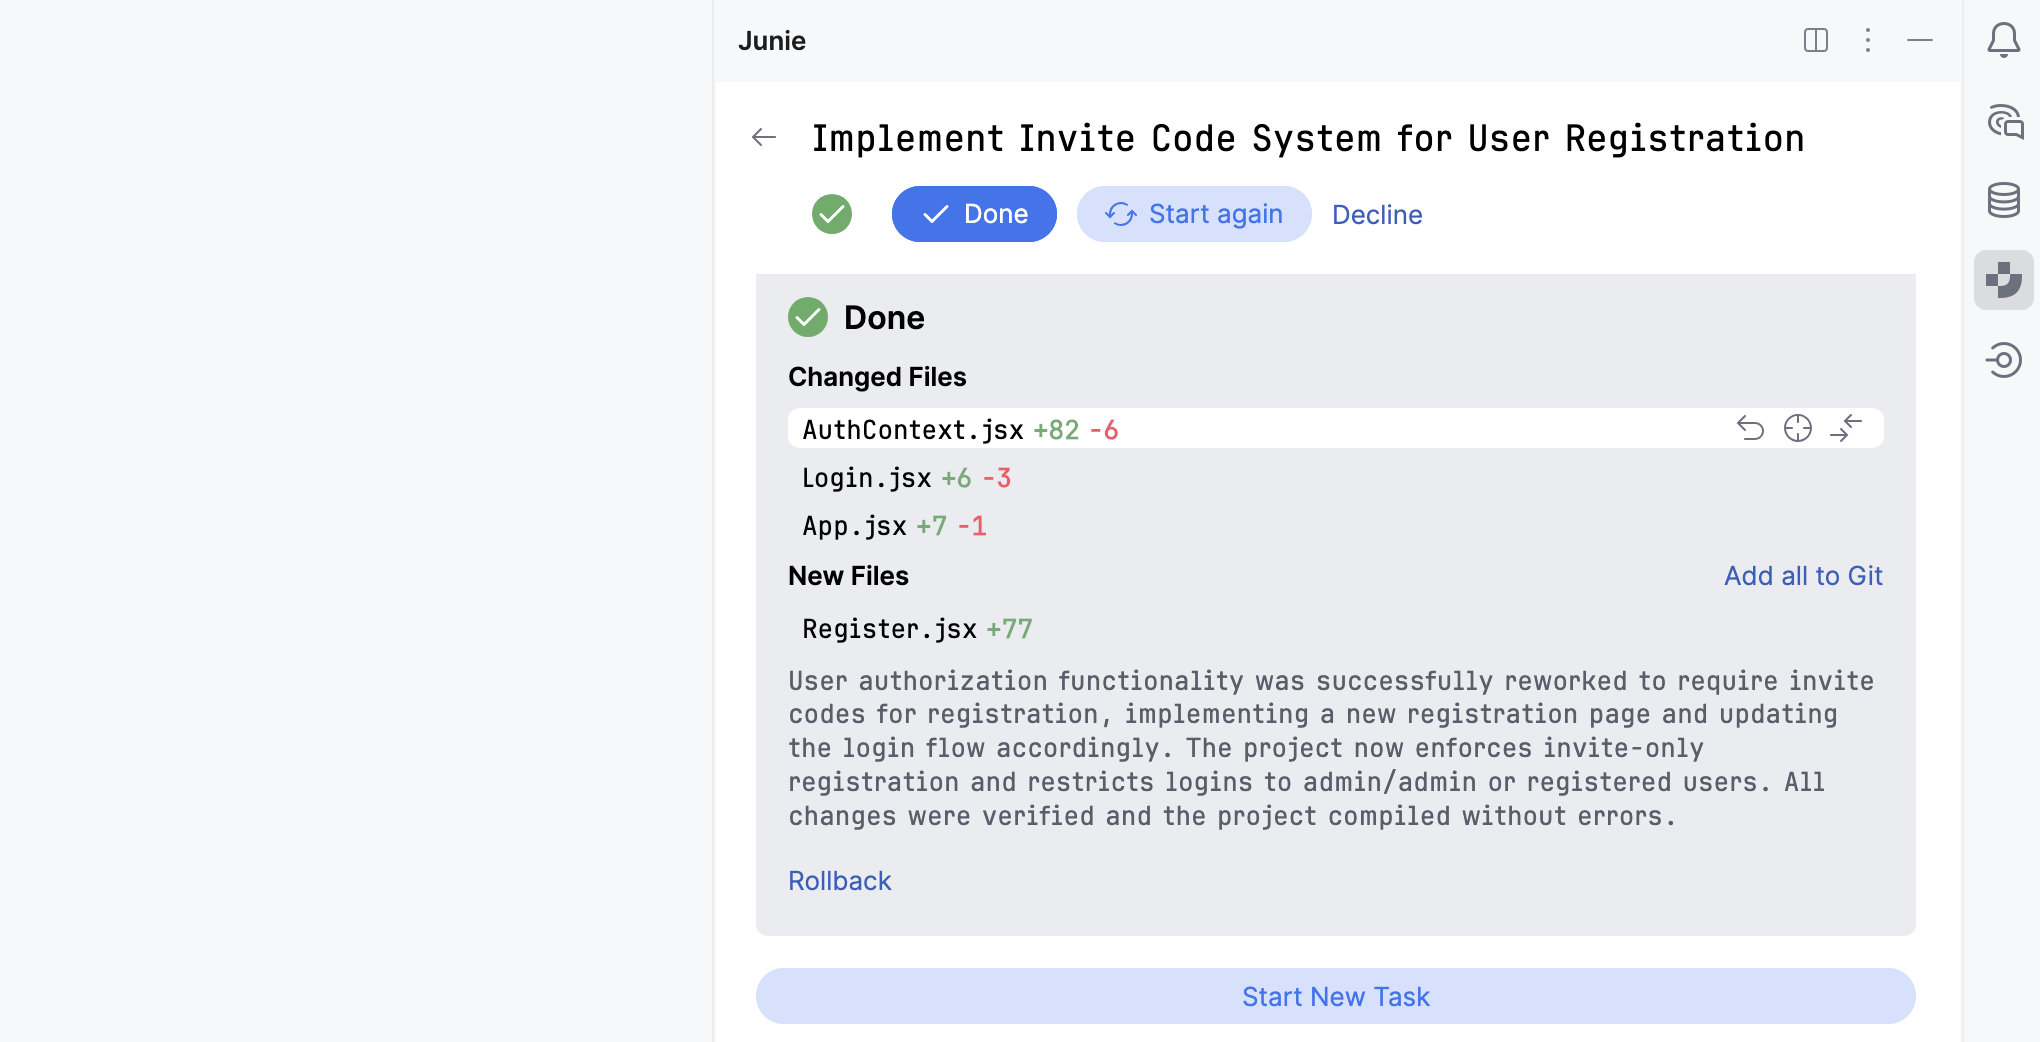
When Junie completes the task execution, all changed and added files are listed in the Done panel.
From here, you can review and selectively revert the code changes file by file before accepting or rejecting the prompt execution result.
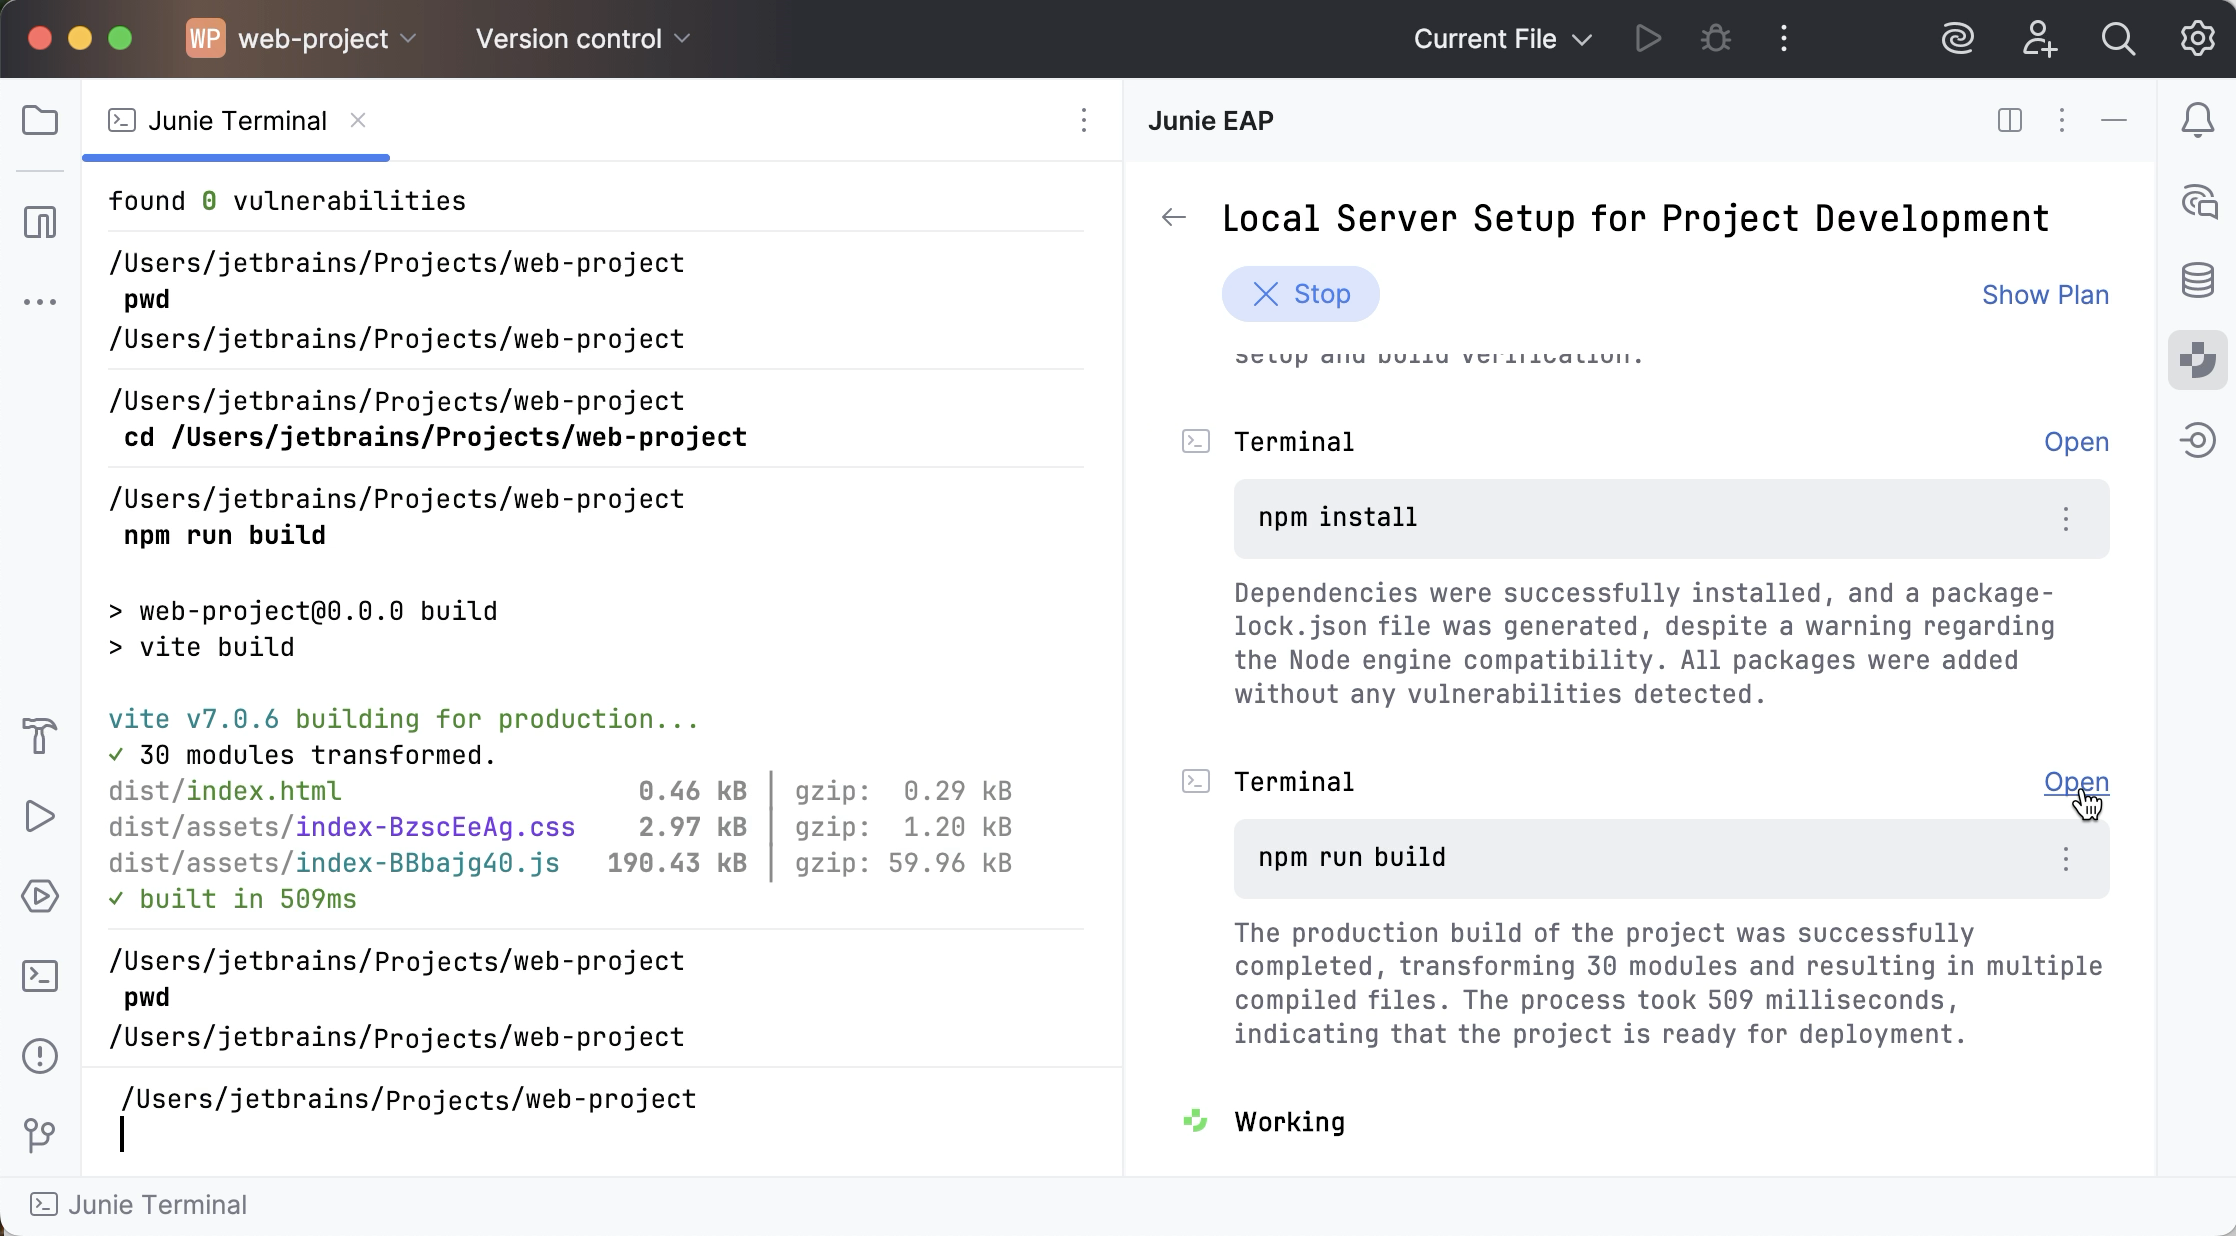
Open Junie's terminal
You can open Junie's terminal to view the output of the CLI commands that the agent runs or provide user input in case the currently executed command is waiting for it.
Guidelines
Guidelines allow you to provide persistent, reusable context to the agent. Junie adds this context to every task it works on.
Guidelines are stored in the .junie/AGENTS.md file in the root project directory, so you can version-control them and reuse at the project level. For more information on the format, see the AGENTS.md documentation.
When Junie starts a task, it looks for guidelines in the following order:
Custom path: If a specific path to guidelines is specified in the IDE's project settings (Settings | Tools | Junie | Project Settings).
.junie/AGENTS.md: This is the most preferred standard location. If it exists, it is used exclusively and no other guidelines files are combined with it.AGENTS.mdin the project root folder: If no file is found in the.juniefolder, the project rootAGENTS.mdis used, combined with.junie/playbook.mdand every.junie/rules/*.mdfile, if present.Legacy locations (deprecated):
.junie/guidelines.md.junie/guidelines/directory (it collects the contents of all.mdfiles inside).
MCP configuration
You can connect Junie to Model Context Protocol (MCP) servers. This will provide Junie with executable functionality for working with data sources and tools, such as file systems, productivity tools, or databases.
When running a prompt, Junie analyzes what commands registered with the configured MCP servers as available tools are relevant, and executes them through the respective MCP server.
Add an MCP server
To connect Junie to an MCP server, add this server's JSON configuration to .junie/mcp/mcp.json either at the project level or globally.
Global configuration. The MCP servers added via the Tools | Junie | MCP Settings page in your Jetbrains IDE settings are saved to the
~/.junie/mcp/mcp.jsonfile in the home directory. Such servers are available globally for all projects that are opened in the IDE.Project-level configuration. To configure an MCP server at the project level, add an
mcp.jsonfile manually to the.junie/mcp/folder in the project root.
- Where to get an MCP server
There is a variety of local and remote MCP servers available, depending on your use case and setup. As a starting point, you can explore the reference servers provided in the official MCP repository, which includes examples, usage instructions, and configuration details.
For example, a configuration that sets up a GitHub MCP server looks as follows:
Authentication
At the moment, Junie does not support security tokens in MCP configs. As a workaround, you can load environment variables from Docker's .env file. For example, in the GitHub MCP server config example, you can move the "GITHUB_PERSONAL_ACCESS_TOKEN" secret to the ~/.env.mcp file:
If the MCP server is not run via Docker, you can preload environment variables from a file using an additional script, for example npx dotenv -- npx ....
Manage configured MCP servers
The MCP servers configured at both global and project levels are displayed on the MCP Servers list in Settings (Ctrl+Alt+S) | Tools | Junie | MCP Settings.
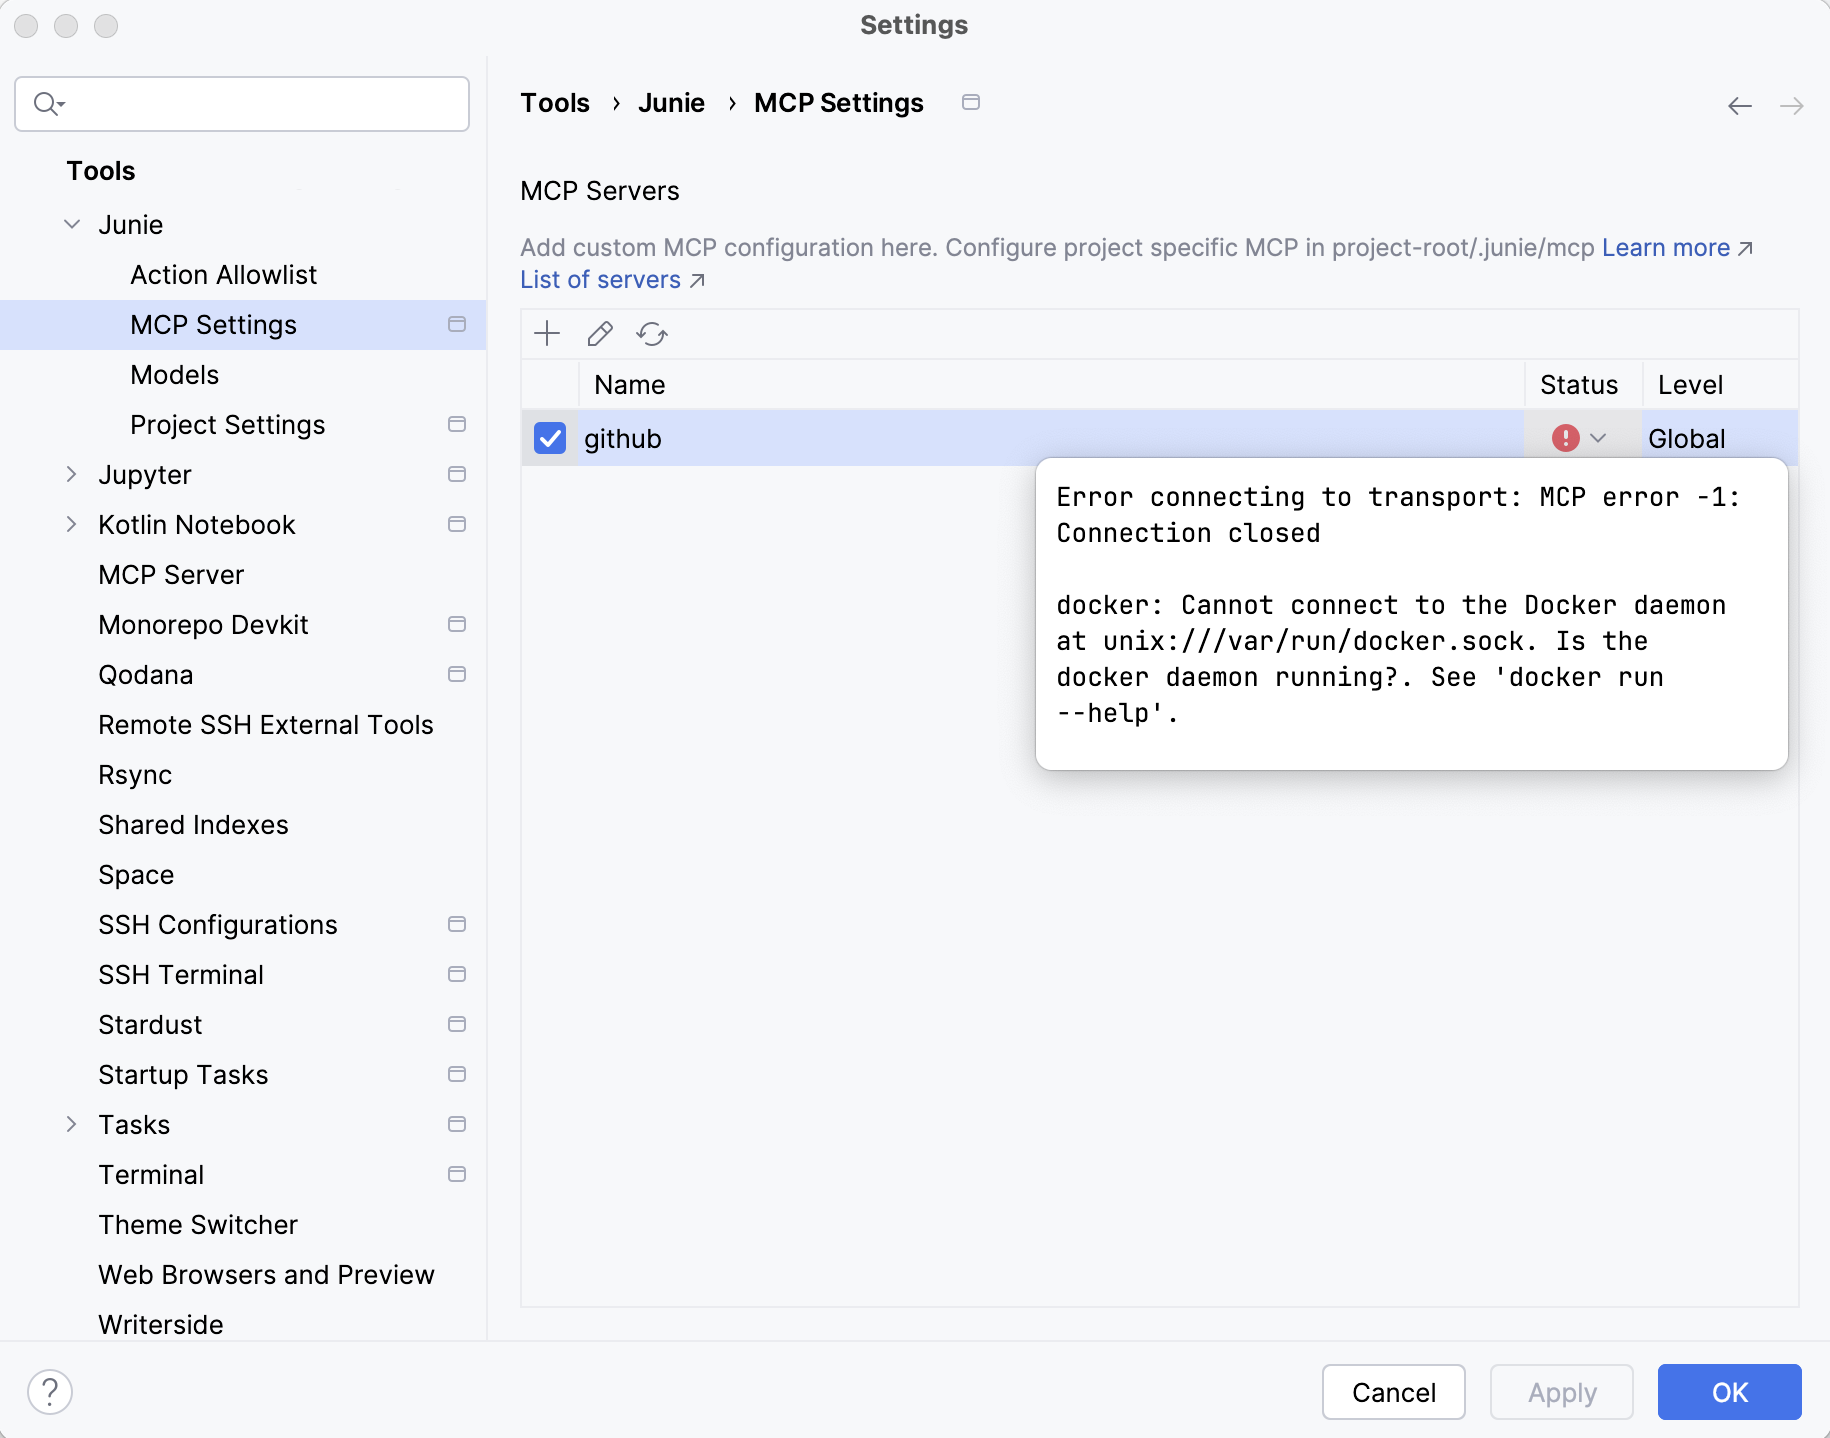
Server connection status
To see the connection status for a configured server, check the Status column. In case of a connection failure, hover over the status icon to see the error message.
Edit server configuration
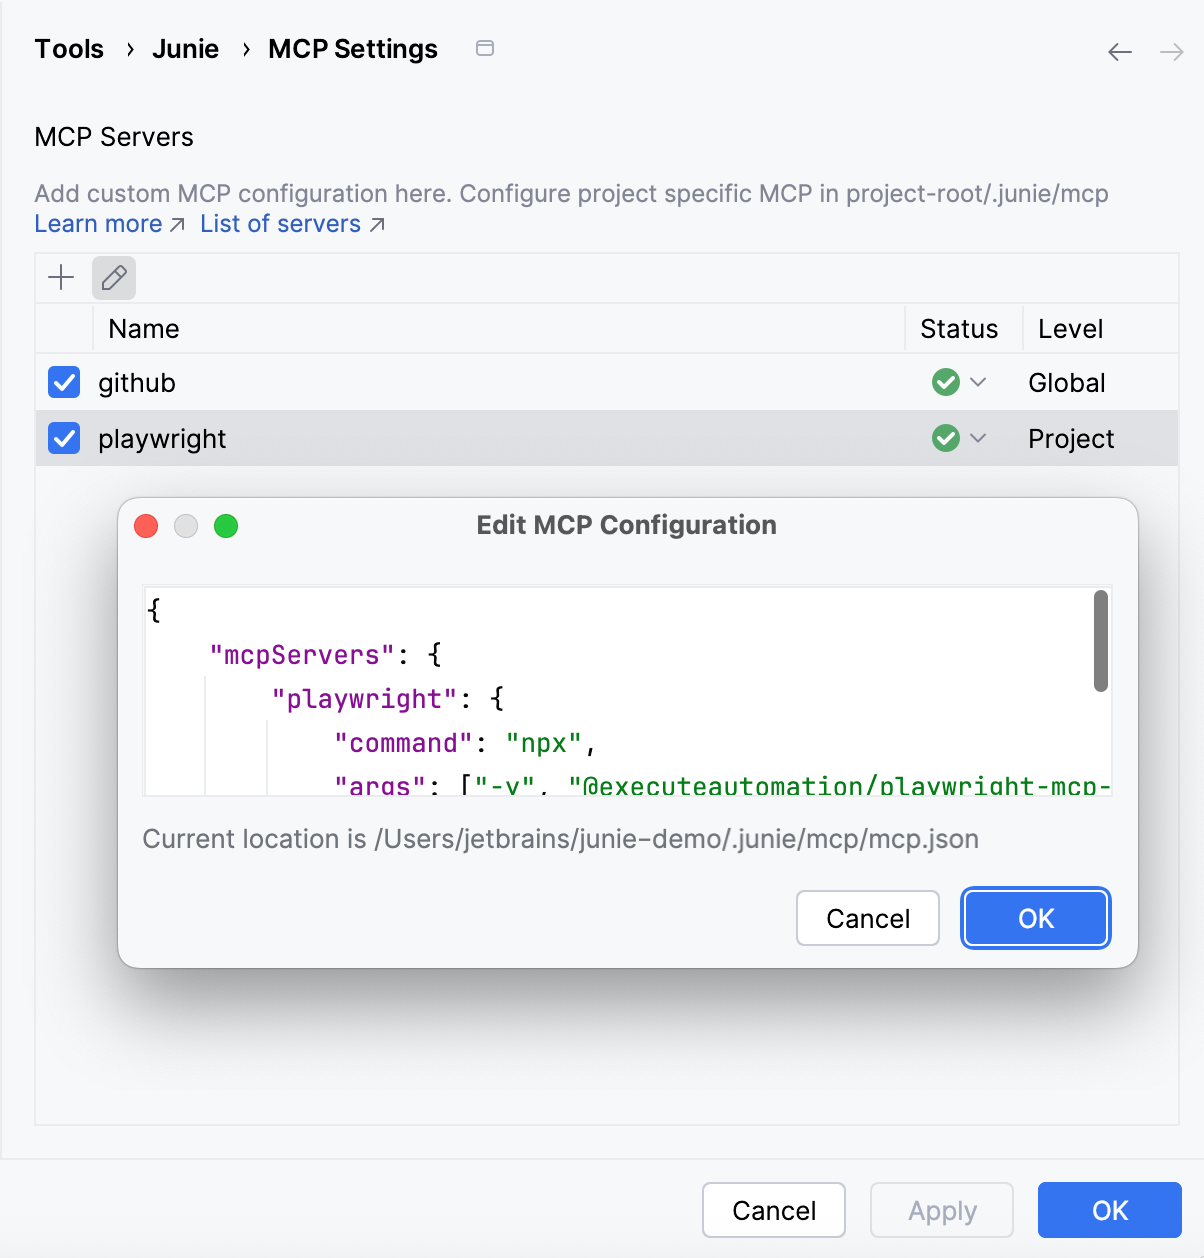
To edit a configuration, select it on the list and click  on the toolbar.
View available tools
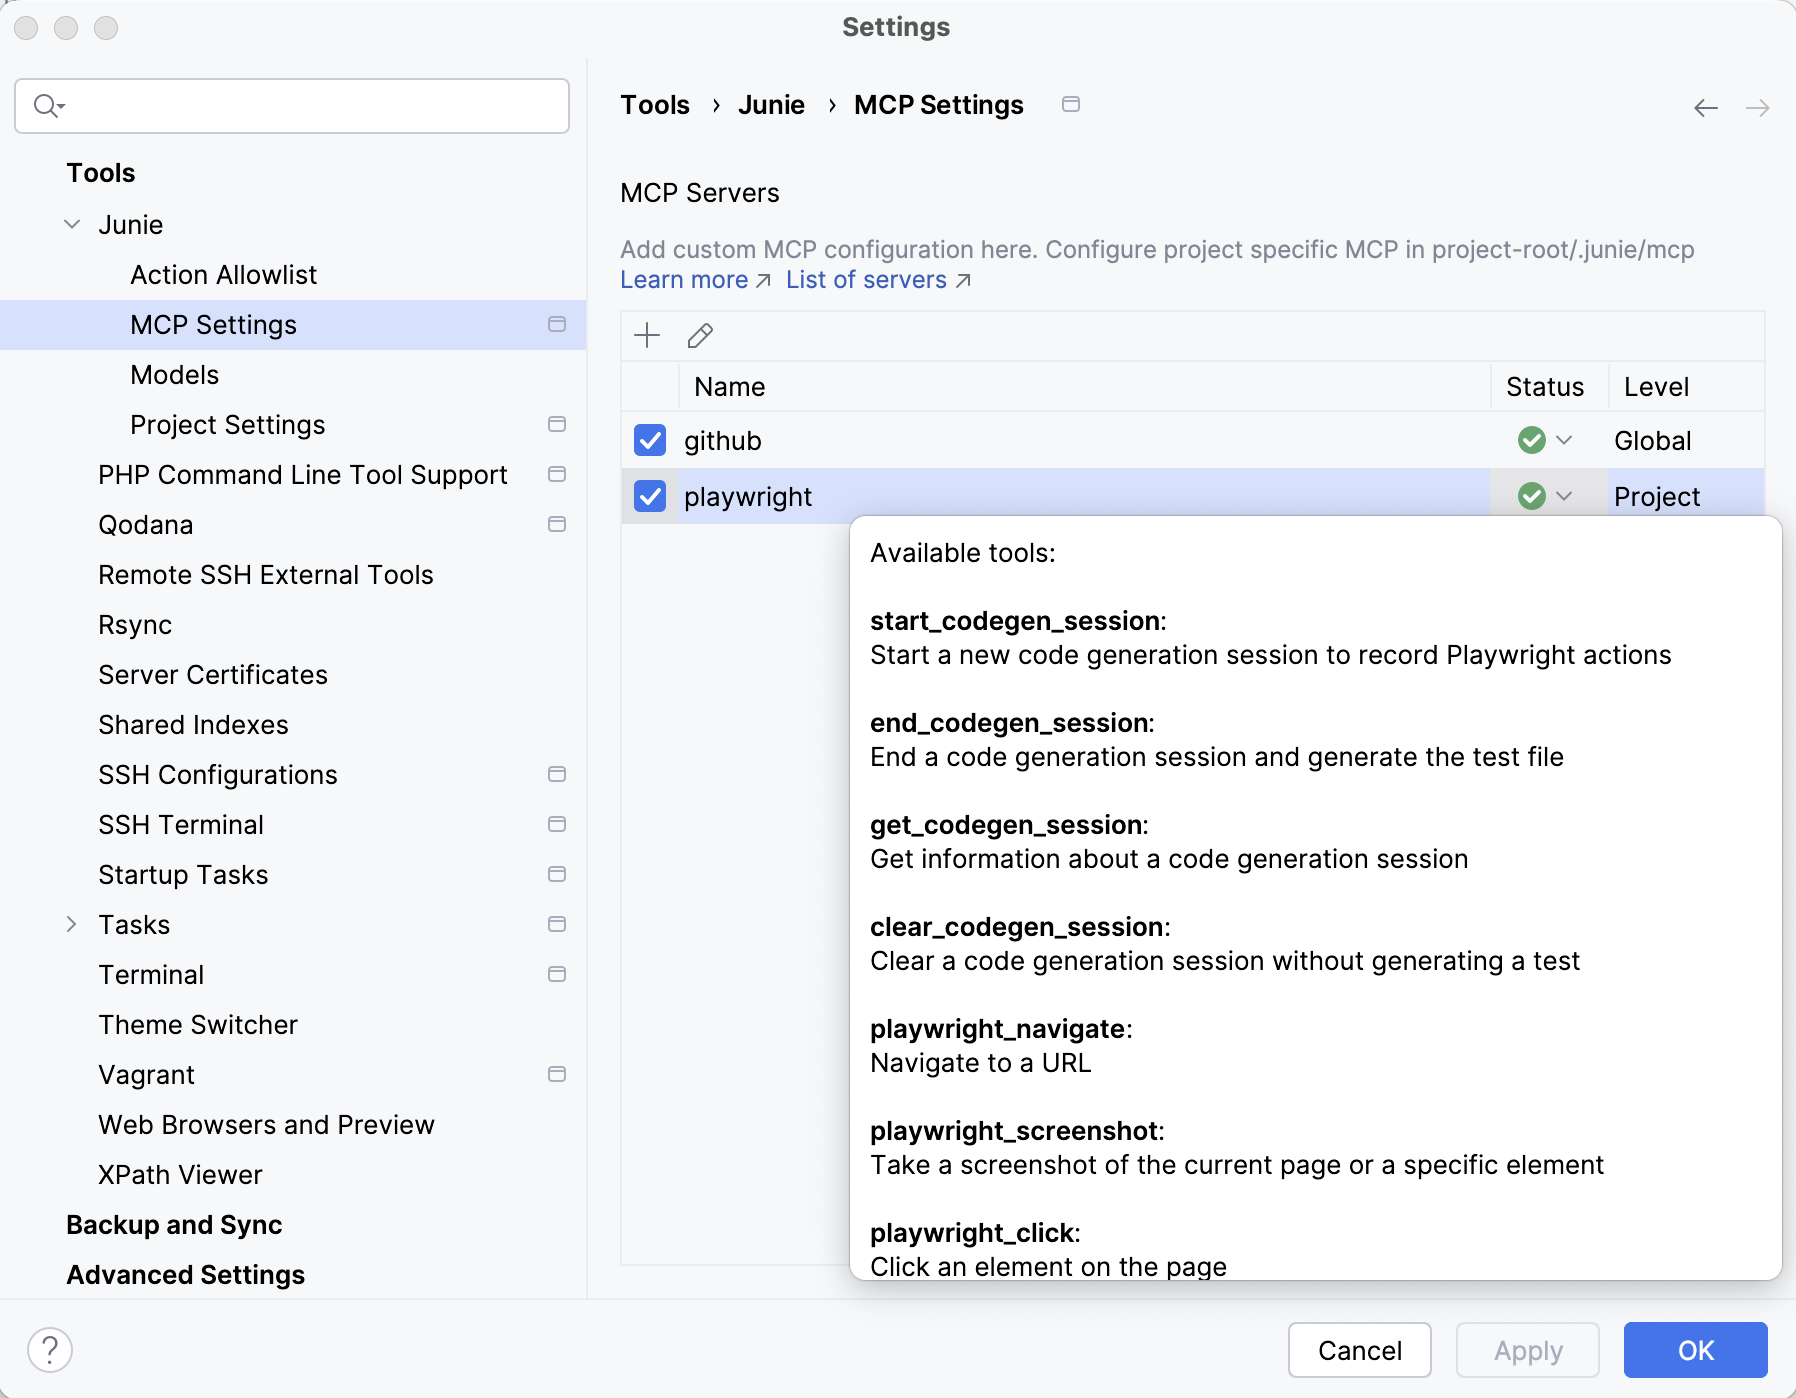
Actions that Junie can perform through configured MCP servers are listed as available tools.
To view what tools are available for a specific MCP server, navigate to Settings (Ctrl+Alt+S) | Tools | Junie | MCP Settings, locate the server on the list, and expand the Status drop-down list.